Thursday, October 25, 2012

Painting a Castle


OK... this was a few years back, but I had so much fun doing this.   I worked on this mural for a little girls room with two of my sisters.  They worked on the village. 


I painted the castle.  
Preview

The trick to painting a wall with fun stuff is scale.  Too big, and it overpowers the room.  Too small and, well it disappears.
 
This was done in Sundee's little girl's room.

Don't you just love the little pony tails!


New?...Storage....LUGGAGE

I am sick and tired of the storage "solutions" being damaged or just is not the right size....

Well. I have found a solution. I am taking luggage (solid) and painting them to fit my beauty girl's color scheme. Now we have Polly pocket storage, barbie storage, stuffed animal storage and art supply storage. And all of it fits under her bed. By having all of this luggage taking up all of the room, it helps keep other things from being shoved under the bed.
(After all, that is the meaning of cleaning your room. Push it under the bed and no body will be the wiser. Right?!)

Anyway. On to the process.

  • Find old luggage.

(I happened across this really nice set of Samsonite. The insides were in prime condition. a little wash and good as new.)


  • Lightly sand the out side shell.

(tape off anything you want to keep paint off of. I taped the handles and latches.)

  • use "good" spray paint. I used Krylon.

(several coats will be necessary. I should have primed the luggage first. Then I would have only used One can of the ballet slipper pink. But none the less, I did need two cans of paint for three pieces of luggage.)

Now for the cream. I could not find a crown to save my life and I did not want to have PLAIN luggage storage. It needs a little whimsy. I made a stencil out of laminating film. After I used a good sharp exacto knife and cut away the pieces that would show on the luggage, I taped the stencil into place. This is where I used a different color of paint. Bronze? I think was the color. But It goes great in her room. And Yes! I did have to cut out a second crown stencil because my first one was too big to fit on the train case (which houses the small Polly
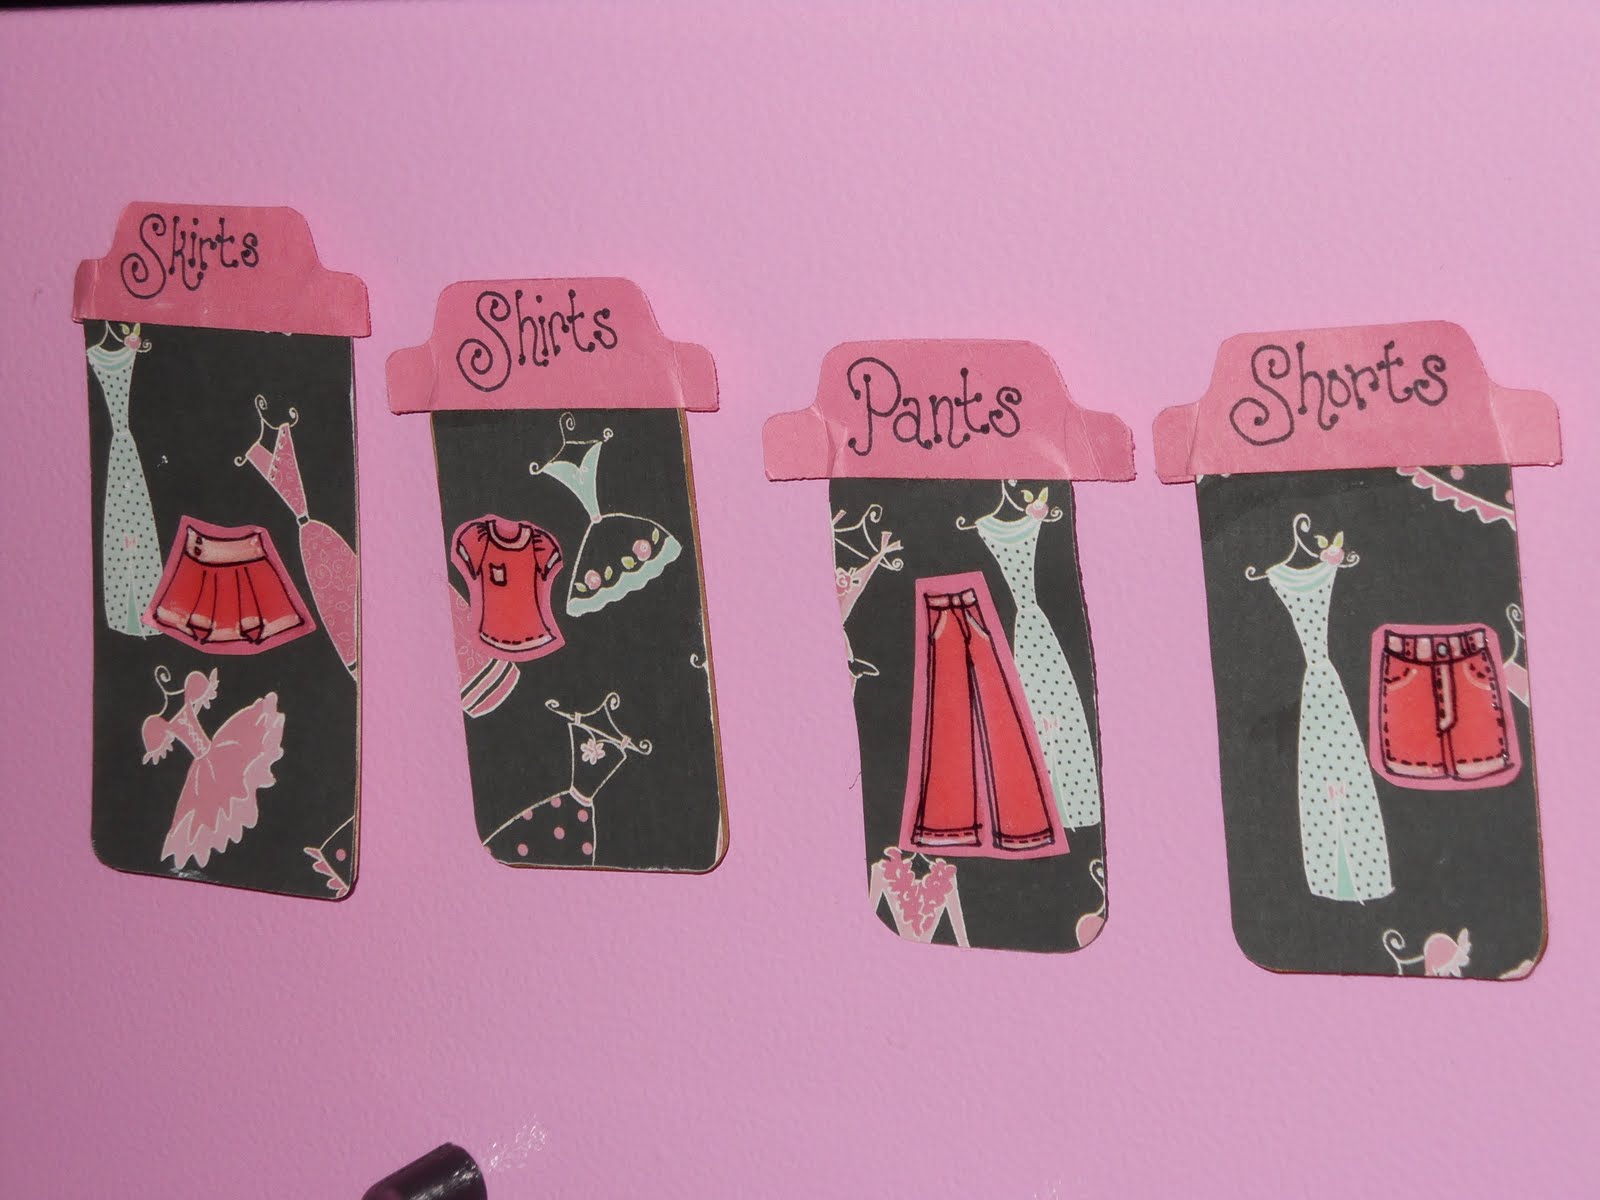
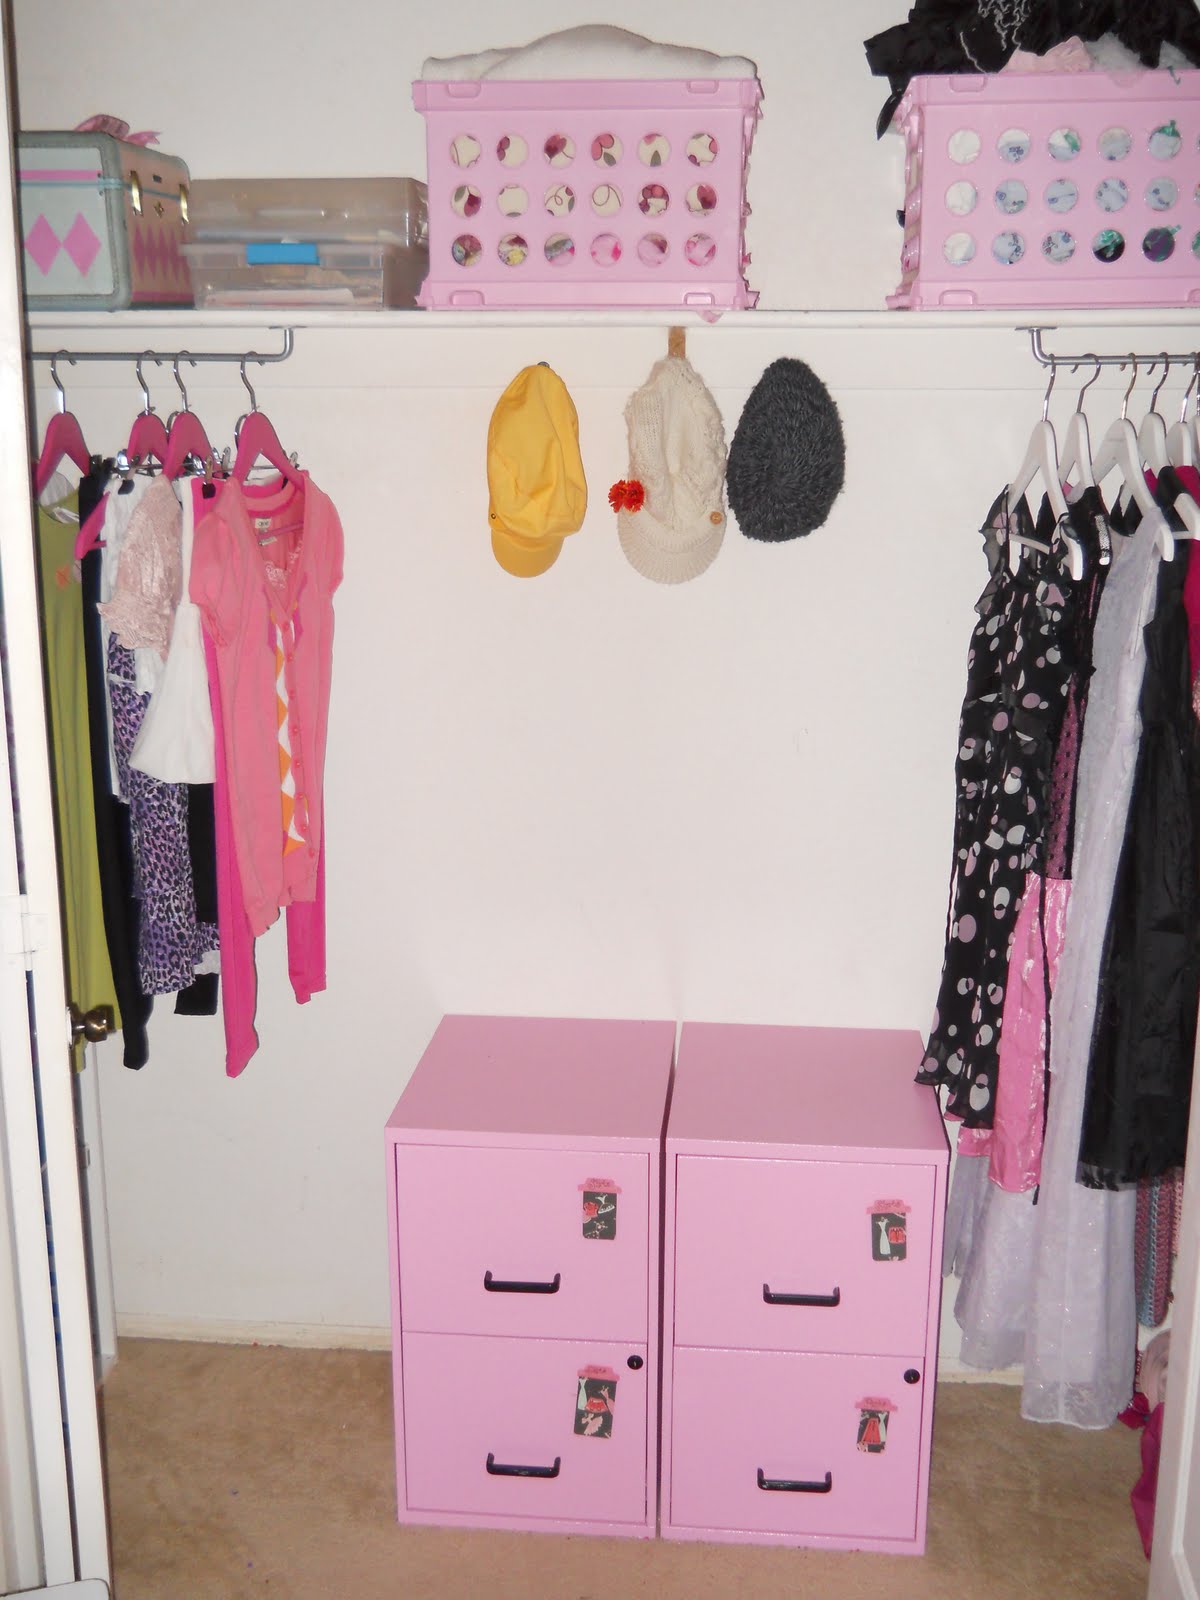
 pocket dolls).

We have filled the suitcase storage and now have some great places to keep her stuff. UNDER the BED! Hooray!!!

Organize a little girl's room....

This is the never ending project...."Lets organize your room"

My Beautygirl wants to keep absolutely everything that has ever passed through her hands. So we are working on a system to make her room more organized. (I can always dream)

This is the dresser. It is two small file cabinets that are metal.


We have attached tags made out of those lanolin samples. (No I did not steal them. I got them when I was working on a project for school.) A little magnet is glued to the back.


Hopefully, the tags will help the clothes go into the right home.


Also, we took down the huge rod in the closet.
It was warped in the middle. Instead we hung two towel rods from Ikea. We just placed them upside-down and screwed them into the wood shelf.


This way we could divide and conquer her stuff. School outfits on one side. Dresses, coats, etc... on the other.


On the top shelf, there are a few plastic file cubes. Of course we are not hanging files in them. One houses extra blankets and bedding. The other is home to dress-up clothes.


We did install a belt thingy...to hang the belts from.


We have a long way to go. We already did under-the-bed storage, which went really well. (If you want to see the under-the-bed storage, look for the label "luggage".)


So... What do you think?

Fashion Design - doll dress day

My Beautygirl decided that we needed to make doll clothes for some of her dolls.

I did not have any patterns, so I suggested that we call grandma and see if she did.

I was thinking "quick trip".

--Go to grandmas
--get doll clothes pattern
--go home and begin project...


When I got to grandmas, she was already in the midst of one doll dress for another granddaughter. Grandma accused me of getting her involved in a NEW project. I told grandma what my plan was and then.... I discovered that my Beautygirl had set up a very different event. Little did I know that Beautygirl did not just call grandma, but she arranged that grandma would be making the doll clothes for other cousins at the same time. And Beautygirl had talked to the other cousins and told them the plan as well. It was to be a day! Not only that, but Beautygirl had brought some of her fabric scraps to make the doll dress.

She set up a project day at Grandmas--without my knowledge.

Hmmmm.....

So, this time, I figured "What the heck! I am already here."

This could be an opportunity to teach a little sewing.
I let Beautygirl design the dress.


I then made up a pattern (because after all that, the patterns at grandmas were WAY to complex for a doll dress)
I showed my Beautygirl how to pin the pattern to the fabric and how to cut it out.


Well, that was about all she could handle. (After all, she does have a hyper-focus issue that we deal with often)

So guess who made the rest of the dress? You got it...ME!


However, I did require Beautygirl to sew on the buttons.


In the end, The dress turned out pretty darn cute.


Soda Pop Tops

Storage...


I recently needed to be able to hang more things in my Beautygirls closet. I create outfits for school, so the torment of the morning routine is lessened. But! Problem....

How do I get the outfits to hang together. If I hang the skirts on the bar of the hanger, the shirt wrinkles and hides what is under it.


Here comes the awsome part! take a pop top and use it as a hanger connector. Cheep!!!! and the clothes hang like a dream.


Viola...

--Tara

Thursday, October 11, 2012

Vintage bag gathering

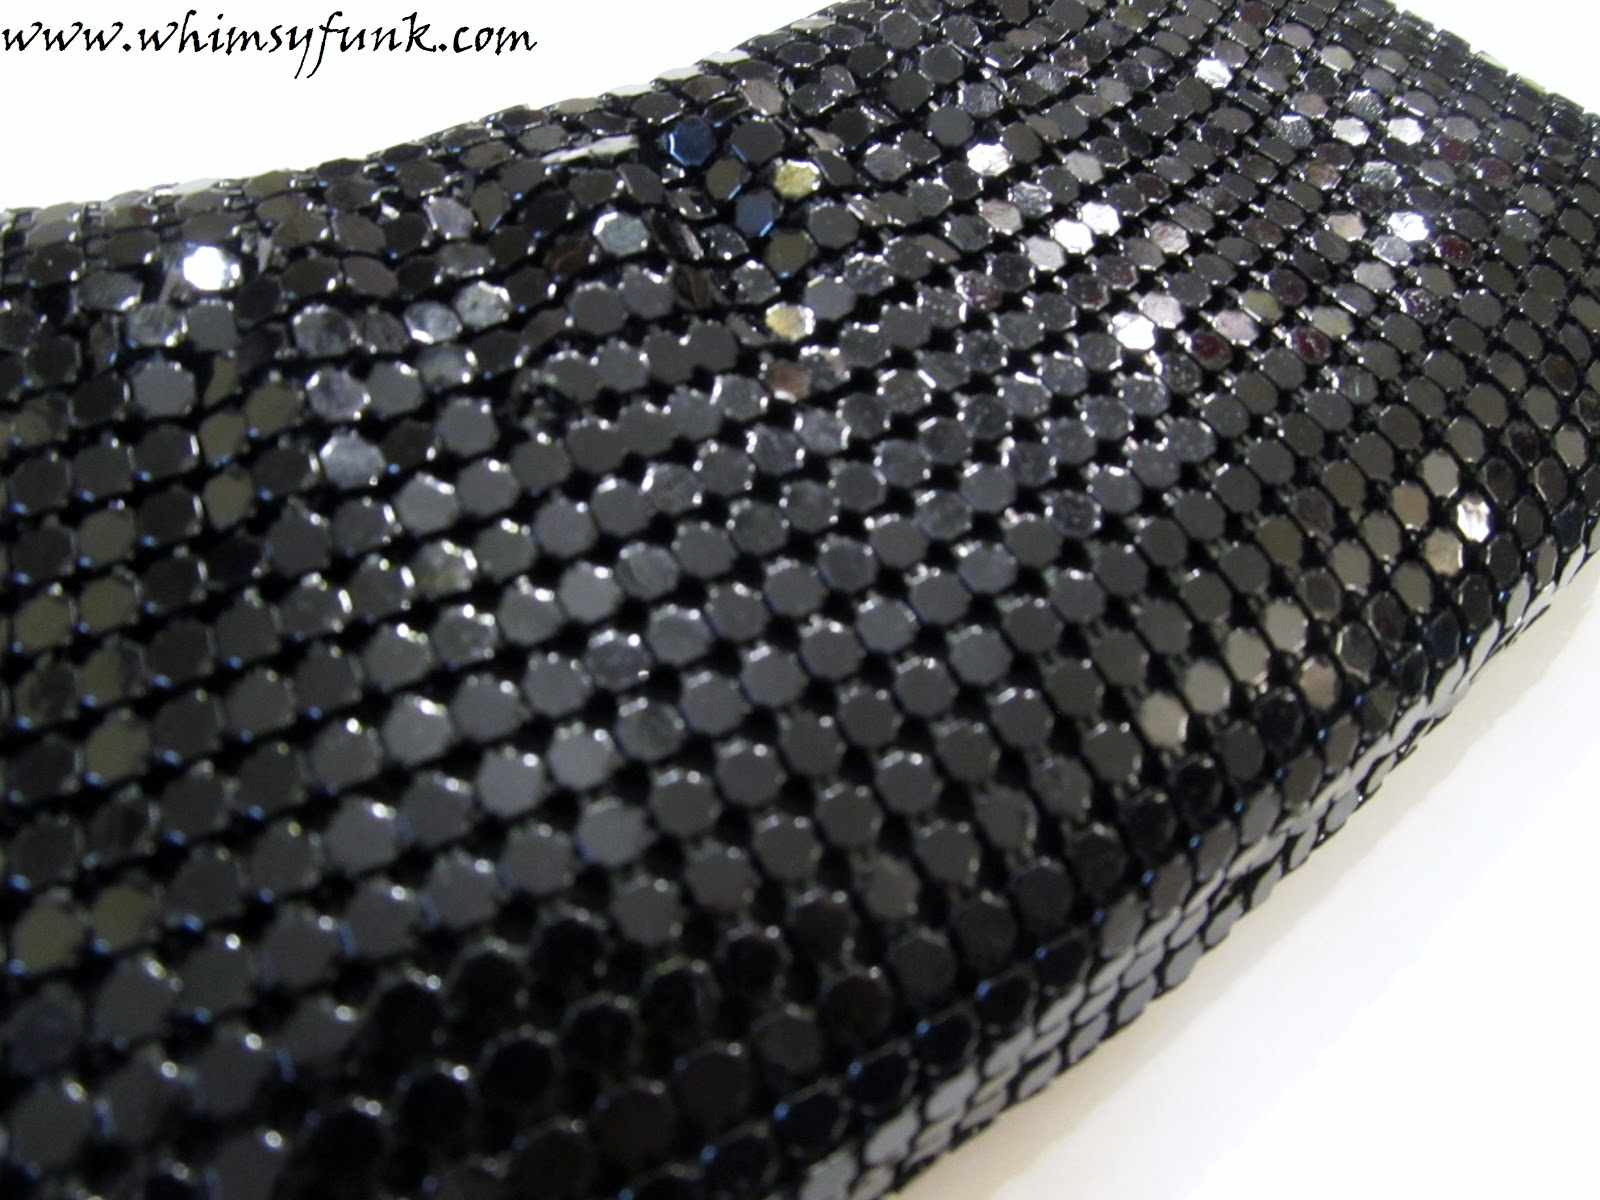
I have a thing for vintage clutches or evening bags.  Alas,  I have collected too many.
These are some of the ones I am ... (insert heavy sigh).... parting with at  this time.  All good things must come to an end.....Maybe not ALL.  If any of these interest you, check out my shop.


Are you seeing a theme of black and cream (and a touch of gold)?
  (I still have several delicious purses I am not willing to part with.)

- Tara 
Bring a bit of whimsy to your funky world.

Tuesday, October 9, 2012

Peter Pan - Collar of Leather- "How To" and Pattern

I just love all of the necklaces and accessories that are out there in the peter pan collar style.  I have been looking at all of the options, and could not find one that I just loved (at least not enough to part with my cash for it.)  I wanted a peter pan collar that was simplified, light weight, flexible and a statement.  So I made one.


This is what I ended up with.  I made it out of deep red leather.  It was a scrap left over from a different project.  I thought I would share how this was made. This was easy, no sewing, no taping, no hot glue.   If you want to make one, I have a link to the pattern in a  pdf 


Supplies:
  • 8 inch by 10 inch piece of leather (I also have used old leather coats that don't fit or have an unfortunate blemish on them.)
  • permanent market
  • cutting tool (scissors or rotary blade)
  • self healing cutting mat
  • punch tool for setting eyelets (ones used in paper crafting work great, but not a paper punch!)
  • acrylic paint or gum tragacanth**  (the gum is sold only at leather supply stores)
  • jewelry findings and clasp closure
  • embellishments


Steps:
  • trace the pattern onto the leather with the marker  
 
  • cut out the collar shape (cut off all of the black markings)


  • punch holes where marked on the pattern

  • rub the gum tragacanth around the edges of the leather.  You can use your fingers or a spoon.  I have done this step both ways.  It just depends on you.  This gum smooths and stiffens the finished edge of the leather.  It dries clear too.  But, if you don't want to get the leather gum stuff,  you can also CAREFULLY paint the edge with acrylic paint, or leave it as is.  

  • attach clasp closure (on the back I used an oval jump ring and a clasp for the closure. A dot of jewelry glue sealed closed the edges of the jump ring.)

You can be creative here. Use a button closure or piece of ribbon and tie the peter pan collar closed.  Do the back first so the front embellishments are not scuffed up.


  • I hooked a jump ring through the two holes in the front and attached some dangle flourishes to it.  I bought these trimmings while I was in Nottingham, England this past summer.  I am so excited to be using them, not just looking at them wistfully.


Again, the pattern for this peter pan collar project is free. To get it,  click here.    I would love to see your projects.  Send me a picture!
(if you can't open the pdf, email me at whimsyfunk@gmail.com and I will send it to you.)

**For the leather stuff (that is bio-degradable with no harmful emissions) you can go to www.tandyleatherfactory.com. It was around $7 or $8.
  

Monday, October 8, 2012

Fashion is not for Sissy's


 For all of you poo poo'ers, take a look at yourself.  Are you wearing something?  Anything at all? (if not, OK... go put something on!)  Fashion is not just frivolous, all humans wear some form of covering.  

That, my friends is Fashion.  

I am going to school for Fashion Design and it is high time the blog reflects that a little more.

There is so much in fashion from the fibers to the fabric, from the designing of clothing to the cutting and manufacturing (sew it up), from trending to marketing,  High fashion to ready to wear, and Fashion forecasting (people actually go out and find what colors and silhouettes will be in style in the future.  I think there is some math and statistics involved too)... someone has to do all of these things.  
Dots and Ruffles... I love you so.


And there is a market for it.... a BIG one.  

I bet you did not know all of that.  
 (the illustration was my midterm.  I was given a swatch of fabric and told to design something.  It had to be completed before the end of class and handed in.) 

Well....I have been designing my own fashion line.  

I am learning pattern making, draping, textiles (what fibers the clothing is made of)
and computer aided drafting for fashion design.   I have already taken the class on fashion illustration.  And yes, that is a job that people get payed to do too.  

The fashion industry is very cut throat and very competitive.  


To quote designer Michael Kors, 
" Fashion is not for sissy's."


 I have been really interested in textile design.

From vintage designs
to the cutting edge, I am so excited to be learning so much about this field. 

 To reflect my schooling, I am also transitioning my etsy shop to reflect more fashion items. (more vintage than anything else).
  Don't get me wrong... paper and I are still best friends.  But there is always room for more friends.

So check back often, and see what new things I have found. 

Tell me what era you love.  I am into the 1940's.

Thursday, October 4, 2012

My Little Man - baby shower!

I just love a good party.  We had such a lovely time at Jannie's baby boy shower. 

The mustache and all things manly was our theme.  (notice that Jannie is wearing the mustache necklace I made for her. Check out the post by clicking on the link above)


We had a photo booth as you entered.  Everyone grabbed a prop (mustache and tie), and headed over to the backdrop for a photo op.


 The picture booth was a smash!

 Guests were going back to the photo booth over and over with different friends. The posing and face pulling kept getting better and better.
We framed everyone's faces too!
(because they held a frame up to their mug.) I'm
so pleased that we decided to do the picture thing.


 Envelopes were put out for the invitees to write their address on.  This trick helps the celebrated sister get her thank you cards out quickly, before her new little guy comes home. 

 A sharpie (or permanent marker) was placed by the cups so the guests could write their name on the cup.  Now there was no excuse for drinking out of the wrong cup.  Although, I think some people just did not care. 

  Jannie (celebrated sister) loves rocks... so after my botched attempt at making rock candy (see previous post), I bought these lovely green ones for table decorations. 
 This was our banner and table scape.  I painted letters on fabric ties and looped them on a rope.  we then hung the rope on the wall.  There were little bow ties on a rope wound around the bottom of the table. 
 These were my gift to Jannie.  I painted her some decorations for her little man's room.  These were quick and easy. 
Because the edges were also painted, they did not need to be framed, just hung as is.


Low key Treats were served.  Popcorn, watermelon, and some other finger foods (I can't remember what they were.)  But we also had cupcakes.


This batch had pop rocks candy sprinkled on top.
Oh what a delight to eat.  They cracked and snapped all the way down my throat. I actually ate two because they were so entertaining.

Here, the wonderful, if less interactive, cupcakes had blue and green sprinkles. There were little signs scattered about the tops of some cup cakes.  Some of the phrases on the sighs were;  
Oh boy,
                              little man, 
                          it's a boy


I think the most important part of this whole event was accomplished!

Everyone had a grand time.