Monday, December 19, 2011

Little Dog- Tango- Mini album

My sister has a friend who recently lost her precious little doggie.  My sister wanted to give a remembrance of the dog to her friend for a Christmas gift.

I made a little memory album for her.
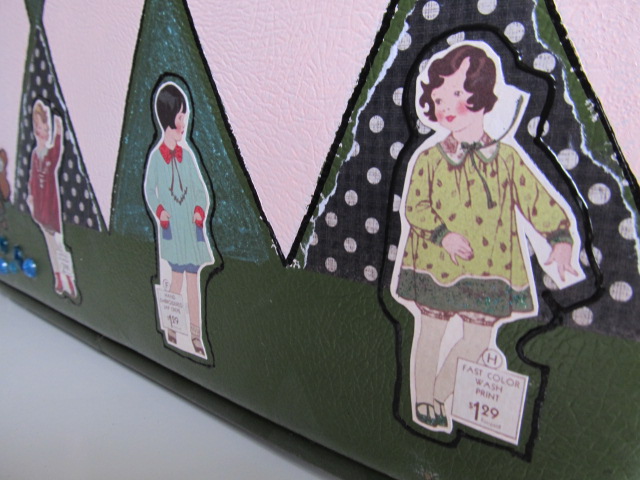
I used laminate samples as the base of the album.

I also got a hold of the words and photos from the friend's farewell email, where she described her little dog and what the dog meant to her.  These are the insides of the album.


It was a fun project.


Merry Christmas.

Red Dress

What once was two shirts,

has become a red dress.

 
I got two shirts on clearance and loved the color and flounce, but I did not want a shirt,  I needed a dress.


So, I cut one of the shirts off and attached it to the other and made my Christmas dress.

Friday, December 16, 2011

NEW YORK - GIRLS TRIP Mini Album 2008

Here is a little album I did of a girls trip I went on. It was a completely fabulous trip.  All of my sisters and mother were there.  (I have 5 sisters, plus me and my mom--basically built in party!)


We went to the restaurant Serendipity.  It is featured in the movie "One Fine Day".

We also saw a Broadway Show - Mary Poppins.

It was Practically Perfect in Every way.  This is a close up.  I used the map from a brochure in the album.  It was a fantastic way to show where we were in the city.


We saw street vendors;
we enjoyed beautiful buildings;
we went to central park;
we stayed in a posh hotel.

It was a fabulous, fast and furious adventure.
  We ran through the rain and the slick streets;
we sang in the subway;
we had a pregnant mommy to be;
we walked and walked and walked.

Absolutely want to do it again!
I hope you enjoy the album.

I sure enjoyed the trip.
Have you ever been to New York?  
What was your favorite part?

Sunday, December 4, 2011

Lil Green Suticase....All fixed up!

This lil altered piece of luggage was not too pretty.

This is the
  after shot: I know it is a little out of order, but i was excited to show off!


and the before!


I took out all of the insides and put new insides in.

I also left most of the original outsides intact.  I just added some paper and painted a few things on the front (like a crown).

Then I  added some BLING.

  I think it turned out pretty good.  I am using it for some storage things in my craft room!

Let me know what you think!

Wednesday, November 30, 2011

Altered Journals - Gift Set

Just a few things I have been working on lately.

I have been making these altered journals that are gift sets.
I Hand embellished each item with glitter and micro-beads.  I also hand tipped a pen to match the journal.
They make great gifts.  I am going to give one of these to my Beautygirl's teacher this year.


These are just a few that I am selling at the boutique on Saturday, Dec 3, 2011.

It is called Paper Moon Craftique.

Come over and check out all of the cool stuff!

Friday, November 18, 2011

Paper Moon Craft Boutique Dec 3, 2011

I am doing a Craft Boutique December 3.  It is in down town mesa, so much closer for some of you.

There will be lots of cool vendors at this one.    Starts at 10 am and goes till 5 pm.  48 N Robson. (just off of Main St) Check out the flyer.  Love to see you there!    --- Tara
Hey y'all,   I am participating in a craft boutique this Saturday.  Come on out if you can.  I have attached the flier with all of the information on it. 
North Phoenix Baptist Church 
5757 N. Central Phoenix 85012
See you there!

Monday, November 7, 2011

Fishin' - Altered-Art Book Mini Album

This is a book I did for a dear friend for her birthday.  It is an altered-art book (which means take a book and turn it into something else.).

We had gone camping together and I got a few great pictures.


Details.


Details.


Edge tabs.


 Here are some of the insides.  This little girl thought the crawdad looked like a "buggie".


Even the dog named "Dottie" posed for her picture.

She Loved the book....  Enjoy!

Wednesday, November 2, 2011

Gratitude Mini Album

For Thanks Giving Last year, I made an album where all of the gathered family wrote something they were grateful for. I added Tags with each person's name on it.  They could write to one side, on the lined paper,  I then printed off a photo (taken on Thanksgiving) and added it next to their thoughts.


Back inside cover, Don't know why it posted sideways... but Whatever!


Just another view of the front tag, showing some of the other details.

So what do you think?

Saturday, October 22, 2011

Caramel Apple Wedges

YUMMY!!

I had to make a treat to take to our annual Pumpkin Carving Party.  I decided that I really wanted to have Caramel apples, but I did not want to take WHOLE apples.  Usually, some or all of the treat gets wasted in the "whole" form.  So I decided to try caramael apple wedges.

I took:


Caramels (one 14oz. package)
Apples - some granny smith, some gala (about 10 to 12 medium sized)
1 tbsMilk
lemon juice
craft sticks (or I like to call them Popsicle sticks)
wax paper


First prepare the apples:
Cut into fourth's
cut out the core parts (seeds, stem, etc)
dip exposed edges into lemon juice
(you could skip the lemon juice if you don't care that the apples turn brown)
line the apples in a few rows on top of wax paper on a baking sheet

Next, the caramel.....
unwrap an entire package of Kraft caramels.  (you can use another brand if you like, but I like the taste and texture of Kraft.)
place unwrapped caramels into a 2 cup glass measuring container.
(you need the whole thing full up to the 2  cup mark with caramels)
add one tablespoon of milk
microwave in thirty second intervals, stirring at each break.
repeat until the caramel and milk are well blended and smooth.

Now, the fun part!
Drizzle the caramel over the apple wedges ( mine would have worked better if I had let the caramel cool a little... it would have stuck to the surface better...but it did not effect the taste!)
poke the Popsicle stick into the middle of the wedge.

Pop into the fridge to solidify the caramel.


Tad-ah....Yummy.  I only tasted a half a dozen before I decide to share with my kids.

Monday, October 10, 2011

Lil' Pink Pin Cushion- tutorial


Here is my assembled items.  Fabric, an assortment of ribbons and lace and crushed walnut shells for the filling.

First you cut out a circle,  I just used a cereal bowl.
Next I sewed a few ribbons across the circle.

Thought you'd like to see a close up.


Sew around the edges, leaving a bout a 1 1/2 to 2 inch opening for turning and filling.  I also zig zagged the edge to make it stronger.


Turn the circle so the cute out side is displayed.  Then fill it full of crushed walnut shells.  Full, but not too full.  You still have to close the dang thing.

Stitch the opening closed.

Here it is all filled, but it is not finished yet!


 Next you take some sort of thick thread and sew six little stitches and make a pie shape.  I had to get out my needle nosed pliers to pull the needle and thread through the center.
It was that tough!

I grabbed an assortment of embellishments.  I did not use all of these, but you get the idea. 


Then embellish.  I glued the pieces right on top.  This covered up the knot from the stitching.Viola.


Beautiful pin cushion.
PS--this was a gift for my Beautygirl for her birthday.  She just turned 12 and I bought her a sewing machine.  She just LOVED both the machine and pin cushion!